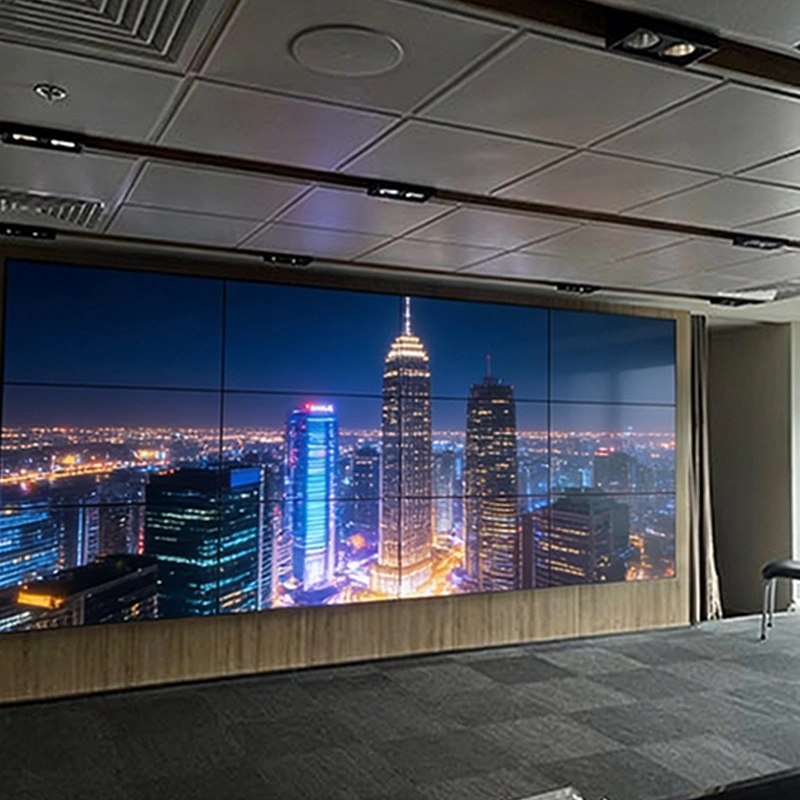
Qtenboard is proud to announce the successful completion of a 3x4 LCD video wall project in Vietnam. The project proceeded smoothly, and the customer has shared pictures of the final installation, showcasing a vibrant and seamless display.
Upon receiving the 12-screen video wall, the customer carefully inspected each screen and powered them on to confirm functionality. Thanks to Qtenboard’s premium packaging with thick foam in honeycomb boxes, all screens arrived in perfect condition, ready for installation.
The customer first marked the installation points, mounted the wall frame, attached the screen brackets, and installed the wall sockets.
Screens were installed from the bottom row upwards, with wiring completed simultaneously. Each screen is equipped with a control box offering versatile input/output options:
Accessories included: power cables, RJ45 cables, IR receiver, remote controller, HDMI/DVI/VGA cables, USB-RS232 converter (with driver CD), RS232-RJ45 converter, and the video wall software CD.
Most PCs are equipped with an RS232 port, allowing direct connection to the video wall. If a PC lacks RS232, a USB-RS232 converter is used.
Connection steps:
This setup enables smooth centralized control across all 12 screens.
Designed for advertising and multimedia display, this 3x4 LCD video wall uses a 1-in-16-out HDMI splitter:
After installing the video wall software and completing system debugging, the video wall was ready for full operation.
The Qtenboard 3x4 LCD video wall delivers crisp, synchronized images and videos across all 12 screens, providing an eye-catching and professional display solution.
With precision installation, reliable connectivity, and comprehensive support, Qtenboard ensures every video wall project achieves optimal performance and visual impact.
Click to read the product details and learn about its functional features and actual performance.
📖 Read Product
 EN
EN  MAY
MAY  TH
TH  CHT
CHT  BUR
BUR  FIL
FIL  HKM
HKM  ID
ID  LAO
LAO  SIN
SIN  VIE
VIE